
Meanwhile, Sir Cuthbert and Sir Jeremy headed to Tisbury, on the Naddar River, to the south-west of Sarum. Word had come in that a giant worm was terrorizing the village. When they arrived, they questioned the peasants about the monster. Apparently the worm was like an earthworm, but far, far larger. It lived down the well in the middle of the town, and emerged at night to carry off livestock. Sir Cuthbert, somewhat confused, claimed that the worm would protect the town, and the peasants should give offerings to it. Fortunately, Sir Jeremy had read about something like this before, and corrected him - it was a monster, and needed to be destroyed.
The two knights agreed to lay a trap for the worm that night. They found a sickly lamb to serve as bait, and tethered it in the town square near to the well. The area was liberally doused with oil, and Sir Jeremy waited on a nearby roof with his bow and arrow and a brazier, to ignite the oil. Sir Cuthbert waited nearby, with a cover for the well to block off the worm's escape. As expected, the worm emerged. As soon as it seized the lamb and devoured it, Sir Cuthbert slammed down the cover while Sir Jeremy ignited the oil. However, this served more to anger the worm than hurt it! With a terrible mouth sporting rings of razor-sharp teeth at each end of its body, the worm attacked Sir Jeremy and Sir Cuthbert both, while the flames began to spread throughout the town square.
.jpg)
The fighting was fierce. The smoke and fire took its toll on fighters and fiend alike, but eventually with a mighty stroke, Sir Jeremy cleft the worm asunder. However, this did not kill the worm. Ichor sprayed from its wound, but both ends continued to fight individually. Finally, the battle got the better of Sir Jeremy, and he fell. His squire fled, and the building beneath him creaked dangerously from the flames. Sir Cuthbert saw his comrade's peril. With his swift steed Aescalaxing he could reach Sir Jeremy and save his life; however, if he did so, the worm would doubtlessly escape down the well. He decided to concentrate upon fighting the worm. The fiery building began to collapse, and Sir Cuthbert changed his mind, calling Aescalaxing to him and riding to Sir Jeremy's rescue. However, he had waited too long. One of the two worms ate its way through the wooden cover and retreated down the well; the other had perished in the fighting. So had Sir Jeremy. Hating himself for failing to save his friend, Sir Cuthbert was determined that at any cost, the worm would not escape. He took up his sword and jumped down the well after it. The impact made his blade tear the worm asunder, and the knight plummeted to the underground reservoir and his death.
.jpg)
However, it was not his fate that he should die at this time. Miraculously he survived the fall, and lay senseless at the bottom of the well in the freezing waters, but even this ordeal did not slay him. The next day, his squire Asher of Amesbury organised the peasants to rescue him. Asher herself was lowered down the well on a rope, and brought Sir Cuthbert back to the surface. It would be much time before he recovered from the ordeal; but the blackness that had settled upon him since Sir Jeremy died would never lift. Meanwhile, Asher escorted Sir Jeremy's body back to his sister, Abbess Esther, and revealed to her Sir Jeremy's final secret: he had discovered recently that he had an illicit son, Madoc, from an affair in his youth, who was now nearly of an age to be a man. Sir Jeremy had died before ever meeting the young man. Esther decided that she would seek him out on Sir Jeremy's behalf.
Meanwhile, the campaign in Somerset went slowly. Marshal Helbur led a force made up of the men of Salisbury, reinforced by a mercenary unit led by Sir Cador (who had, like Sir Edwyn, also lost his homeland to Cornwall). King Idres was avoiding any military engagements, and so Marshal Helbur's force spent much of its time trying to outmaneuver a Cornish force. Finally the two forces met each other in battle. Led by the three mighty knights, the forces loyal to King Nanteleod were able to win, and the Cornishmen were forced to withdraw, although in the fighting all three knights were badly wounded. Only Sir Bleddyn was able to walk - the other two would require a month or more in bed to recover.
Upon the force's return to Salisbury, Earl Robert summoned Sir Bleddyn and Sir Cuthbert to him, to discuss what to do with Sir Orlin in Tilshead. The bandit knight had sent an envoy to Sarum, who arrogantly demanded that his master be recognized as lord of Tilshead, in exchange for his oath of fealty. Earl Robert was loath to treat with such a man, but he knew that Salisbury's army was so diminished after the years of fighting that simply reconquering Tilshead by main force was too costly an operation for the time being. Sir Bleddyn, that man of many plots, suggested a plan. He and Sir Cuthbert would travel to Tilshead as Earl Robert's emissaries, and there deal with the problem themselves - without damaging the Earl's good name. Earl Robert agreed.
On the road, Sir Bleddyn explained his scheme. He would demand that Sir Orlin prove his worth in a duel before God. Of course, he intended to drug the robber knight beforehand, to stack the odds in his favour. He also meant to offer to sell out his lord by throwing the duel - to make Sir Orlin complacent. He was well aware that he was badly wounded, after all. He was also aware that Sir Orlin was a suspicious knight, who would be watching out for treachery. When the two knights were brought before Sir Orlin, in a stinking hall full of hooting brigands, Sir Bleddyn made a show of presenting him with a bottle of wine. Sir Orlin refused to drink it, but the wine was merely a cover - for Sir Bleddyn had coated the drug upon the rim of the goblet that he gifted to Sir Orlin at the same time. That night, the two envoys enjoyed the 'hospitality' of Sir Orlin - stomaching the many insults offered to them and to their Earl.
The next day, the duel was fought in the hall. Sir Bleddyn had already made his offer to throw the match in secret, and so deliberately left himself open at first, to lower his drugged foe's guard. However, Sir Orlin had already made up his mind to betray Sir Bleddyn himself. With a pair of mighty blows that caught Sir Bleddyn by surprise, he struck the scheming knight low and then slew him. Sir Orlin and his men jeered and hooted, spitting on the knight's corpse. This proved too much for Sir Cuthbert. He had already lost one friend this year, and now another had died before his eyes - and seeing his body treated in such a manner was the last straw. He drew his sword and challenged Sir Orlin himself. Now the brigand knight's reactions were beginning to slow from the drug he had taken, and Sir Cuthbert was fueled by fury. The second duel was short and bloody, as Sir Cuthbert slew the false knight. The other brigands in the hall made to interfere, producing hidden weapons - they had never intended to honour the duel! Sir Cuthbert attempted to flee the hall, but there were too many foes, and was slain. However, without Sir Orlin's leadership, his band of ruffians could not maintain control over Tilshead. Before long, a force led by Sir Jaradan was easily able to drive them out and reclaim the city for Earl Robert.
Months passed. Sir Edwyn and Sir Helbur recovered from their wounds in Somerset and returned to service, the last of the five knights. (Svenhilde had stayed safe this whole year in Vagon, looking after her lord's holdings.) Another messenger arrived at Sarum - this time, from Wessex, bearing word from the Saxons. King Cerdic regretted the hostilities which had existed between them. His envoy said that the occupation of Salisbury had not been his wish, but had been the actions of his son at the behest of a fey. He offered aid in rebuilding Salisbury, in exchange for military assistance against his allies. Accepting this offer, the knights knew, would be tantamount to swearing fealty to King Cerdic. Earl Robert agreed, and then brashly refused the offer. The envoy left, threatening them that the final reckoning between King Nanteleod and King Cerdic was yet to come - and they would have to live with their choices. In the months to follow, Saxon raiders began to strike at Salisbury across the border, though the renewed defences at Du Plain helped to hold back some of the attacks.
There were also raids in the Bourne River valley - but these were more violent, and conducted by knights, not Saxons. Sir Helbur and Sir Edwyn led a patrol to investigate, and discovered that the raids came from Salisbury's old enemy, Leucomagus. They led an embassy across the border to demand an explanation from the new Steward, Sir Blaines - the young son of Sir Rhisiart, who had died seven years ago in a riding accident. Sir Blaines was convinced that his father's death was not accidental, but deliberate murder ordered by Salisbury, and wanted revenge against Earl Robert - even though he had been only a boy at the time. Sir Helbur decided that further negotiations were pointless, and withdrew. He and Sir Edwyn prepared a force and intercepted Sir Blaines' raiders the next time they crossed the border. The ensuing battle was short and swift; the knights of Leucomagus were beaten, and Sir Blaines fled back home.
Meanwhile, the Saxon religious site at Berwick (which had once been the manor of Sir Albrecht) was burned down by its inhabitants. Following in the idol's footsteps, they decided to die heroically rather than be oppressed. No one had actually gotten around to oppressing them yet, but they felt that it was imminent. They caused widespread damage as they made for Amesbury. until Sir Jaradan led a force that wiped them out.
As the year ended, most of Salisbury was once again under the control of Earl Robert. The county was still in danger; it had lost many heroes, and raiders plundered from the west and the east. However, with the help of the Hamper of Gwyddno Garanhir and the brave sacrifice of its knights, peace had been restored - for the time being.
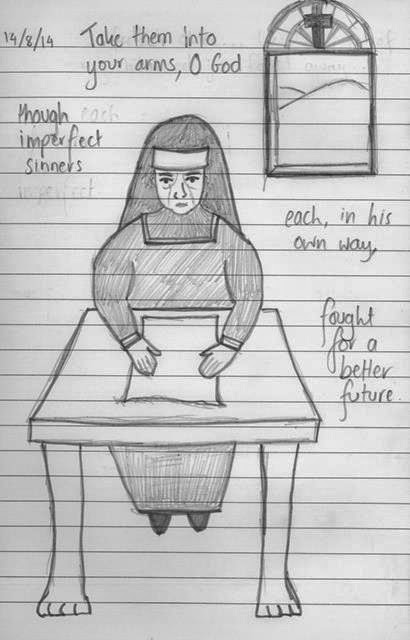
Abbess Esther mourns the fallen.